3 min to read
How to install ThreatMapper in Kali Linux?
One of the best CNAPP
Before starting, let’s understand a few terms,what is CNAPP? CNAPP aka cloud Native Application Protection Platform is all-in one cloud-native software platform that simplifies DevSecops practices.This term CNAPP was orignally coined by Gartner in 2021 CNAPPs make it simpler to embed security into the application lifecycle while providing superior protection for cloud workloads and data. A few core features of CNAPP are:-
- No Vendor Locking, with multi cloud support
- TI(Threat Intelligence)integration
- Shifted Left DevOps Security Management
- Centralised Compliance and Permissions
- Comprehensive cloud workload protection
Now let’s understand briefly what is ThreatMapper?
ThreatMapper is an opensource CNAPP version of ThreatStryker, developed by Deepfence.It gives both agent and agentless based scanning options.
Components:- ThreatMapper consists of 2 components:-
- ThreatMapper Console : It integrates with Infrastructure API to scan & detect config errors, compliance posture with the help of data collected from sensors. It generated SBOMs to find vulnerabilities.
- ThreatMapper Sensors: These sensors support different types of platforms like K8S, Docker, Bare Metal, AWS fargate.
Architecture :-

Installation
For prerequisite please visit offical documentation by Deepfence
In this blog I’m referring official (GitHub Repo](https://github.com/deepfence/ThreatMapper)
Management Console Installation
# Docker installation process for ThreatMapper Management Console

wget https://github.com/deepfence/ThreatMapper/raw/release-2.1/deployment-scripts/docker-compose.yml
Execute the following command to install and start the latest build of the Console
docker compose up -d
Now Let me run command docker ps to see all running images

Now Find my local IP using ‘ifconfig’ command in linux terminal and paste IP address in browser, default deepfence login/signup page will pop-up click on registration for first time user.

Registration page 
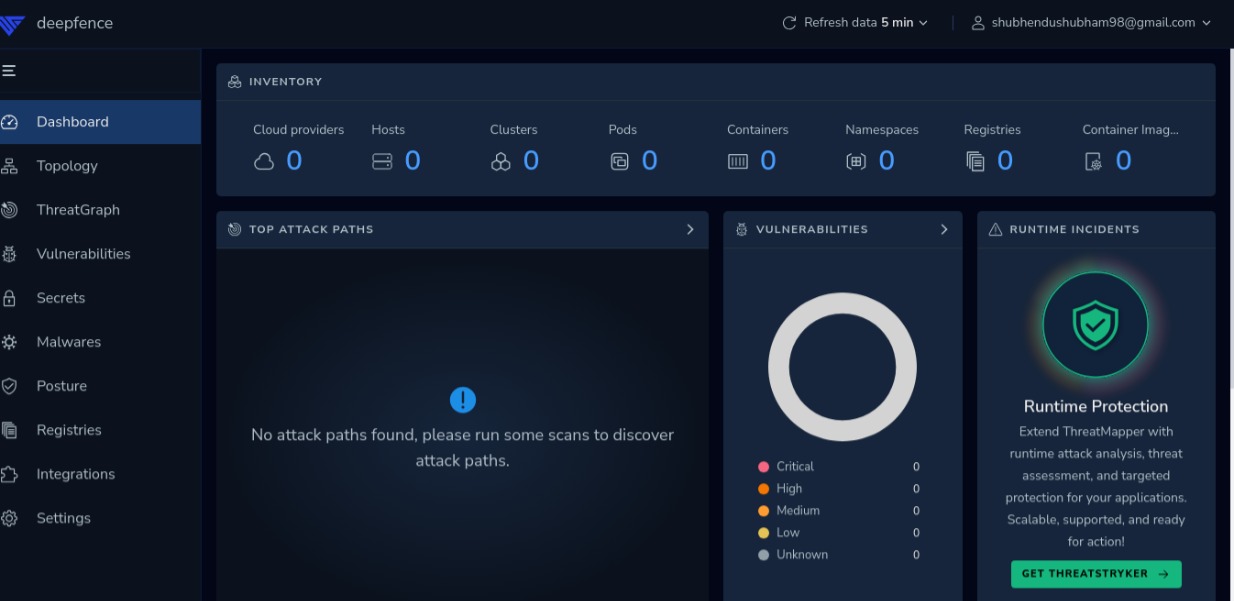
Dashboard
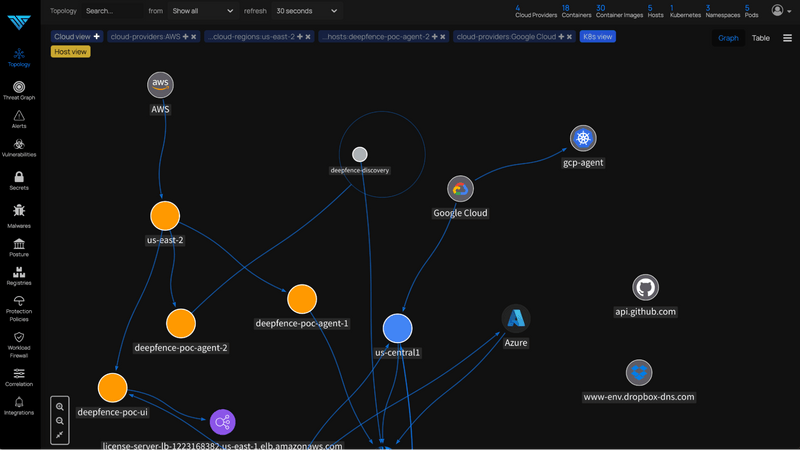
Default dashboard will appear and we need to add connectors

Main Dashboard
Now I’ll connect my Azure cloud provider single subscription as data connector via Terraform. so let’s create a terraform basic file (yourfilename).tf
touch cloud-scanner.tf
Now paste the following command and replace it with your Azure subscription ID, ThreatMapper API, URL etc
 provider "azurerm" {
  features {}
  subscription_id = "<SUBSCRIPTION_ID eg. XXXXXXXX-XXXX-XXXX-XXXX-XXXXXXXXXXXX>"
}

module "cloud-scanner_example_single-subscription" {
  source              = "deepfence/cloud-scanner/azure//examples/single-subscription"
  version             = "0.2.0"
  mgmt-console-url    = "<Console URL> eg. XXX.XXX.XX.XXX"
  mgmt-console-port   = "443"
  deepfence-key       = "<Deepfence-key> eg. XXXXXXXX-XXXX-XXXX-XXXX-XXXXXXXXXXXX"
  name                = "deepfence-cloud-scanner"
  image               = "quay.io/deepfenceio/cloud-scanner:2.0.1"
}
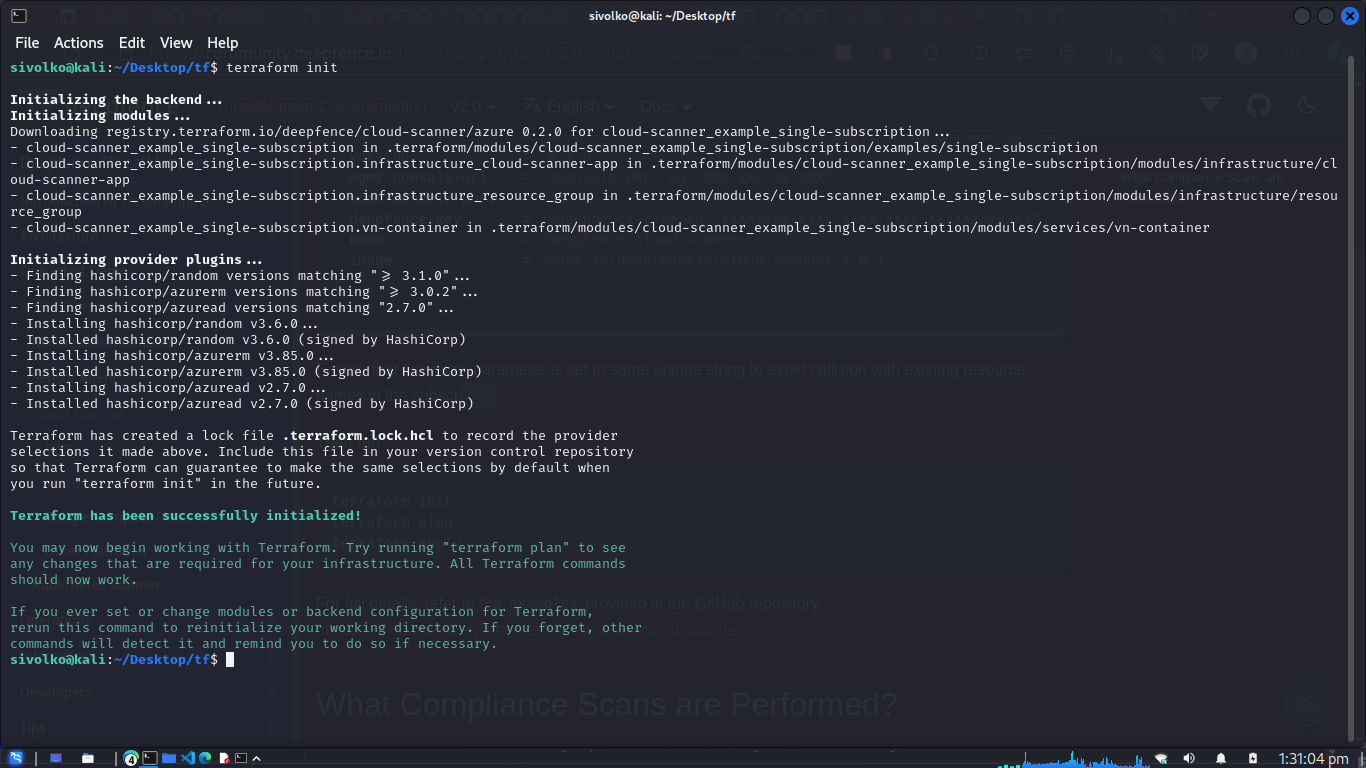
Then initalise terraform inside directory using command
terraform init
Then run command
terraform plan

then run command
terraform apply
to remove scan and connection, run command ‘terraform destroy’
Linux Host
Now let’s scan my own local machine which is runnig as Kali linux as bare metal Linux host.For this we have to install sensors. follow official page for information
commands
 docker run -dit \
    --cpus=".2" \
    --name=deepfence-agent \
    --restart on-failure \
    --pid=host \
    --net=host \
    --log-driver json-file \
    --log-opt max-size=50m \
    --privileged=true \
    -v /sys/kernel/debug:/sys/kernel/debug:rw \
    -v /var/log/fenced \
    -v /var/run/docker.sock:/var/run/docker.sock \
    -v /:/fenced/mnt/host/:ro \
    -e USER_DEFINED_TAGS="" \
    -e MGMT_CONSOLE_URL="---CONSOLE-IP---" \
    -e MGMT_CONSOLE_PORT="443" \
    -e DEEPFENCE_KEY="---DEEPFENCE-API-KEY---" \
    deepfenceio/deepfence_agent_ce:2.0.1
After this there will be change in connected Devices –> visit Topology and Hosts

Now there is no scans 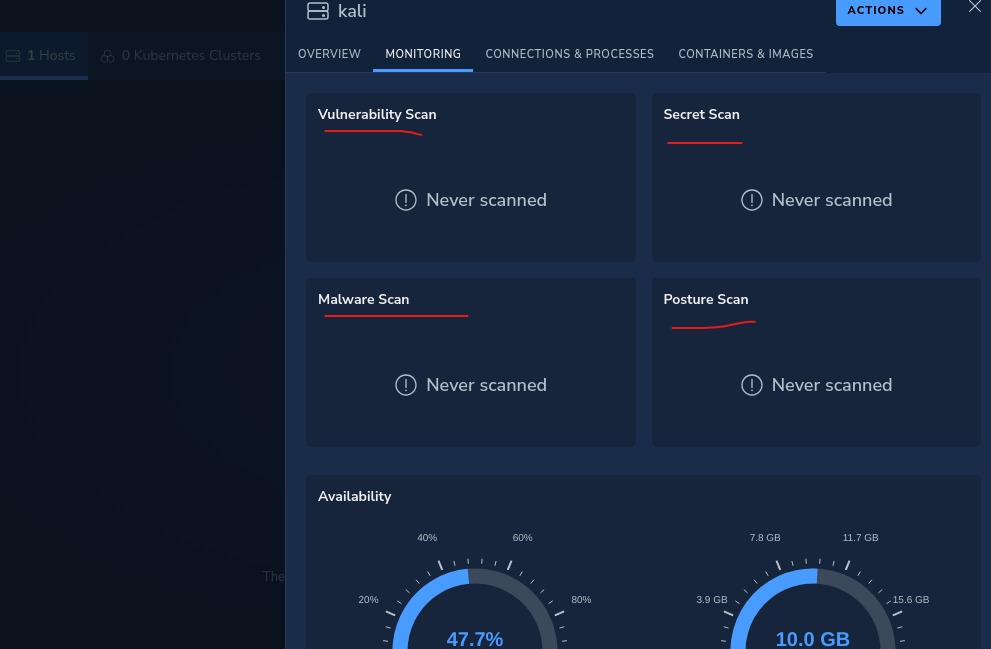 initiated,let’s start quicks Vulnerability scan from top left Action button.
Here I’m doing only OS SCAN
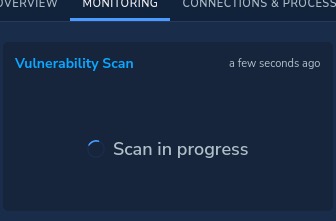
Meanwhile we can check same from Vulnerability blade from right side.

Remarks :-
Doing bare metal/Host OS Vulnerability scan, there might be spikes in Memory and CPU usages.
Thanks for reading blog, keep troubleshooting
Work with me
Got a security challenge, architecture review, or just want to talk through something? Book a free 30-min call.


Comments