2 min to read
How to onboard your first Microsoft sentinel SIEM tool?
Security Monitoring
Before jump over the onboarding of Microsoft Sentinel, let’s understand what MS Sentinel is?
Definition: Microsoft Sentinel is a cloud native SIEM(Security information and Event Management) and SOAR(Security orchestration,automation,and response) solution,which delivers intelligent security analytics and threat intelligence.
Why do we use it? To act as blue teaming as defensive security against attack detection,threat visibility,proactive hunting and threat response.
In this blog we’ll be considering a single tennat onboarding with a single workspace.
Prerequisites:
- Azure subscription
- Microsoft Entra ID / tennant ID
- Sentinel Contributor permission or owner premission at tennant level
- Log Analytics workspace
In this blog I’ll be assuming one have already configured Tennant ID and having a valid Azure subscription.
Onboarding steps:
- Log on to Azure portal
- Search and select for Log Analytics workspace

- Select + Create to create a new workspace

- Choose your subscription, select a Resource Group
- Enter a valid name for the Log Analytics Workspace
- Select a Region to store Logs .Make sure to consider GDPR rule is you are deploying for client
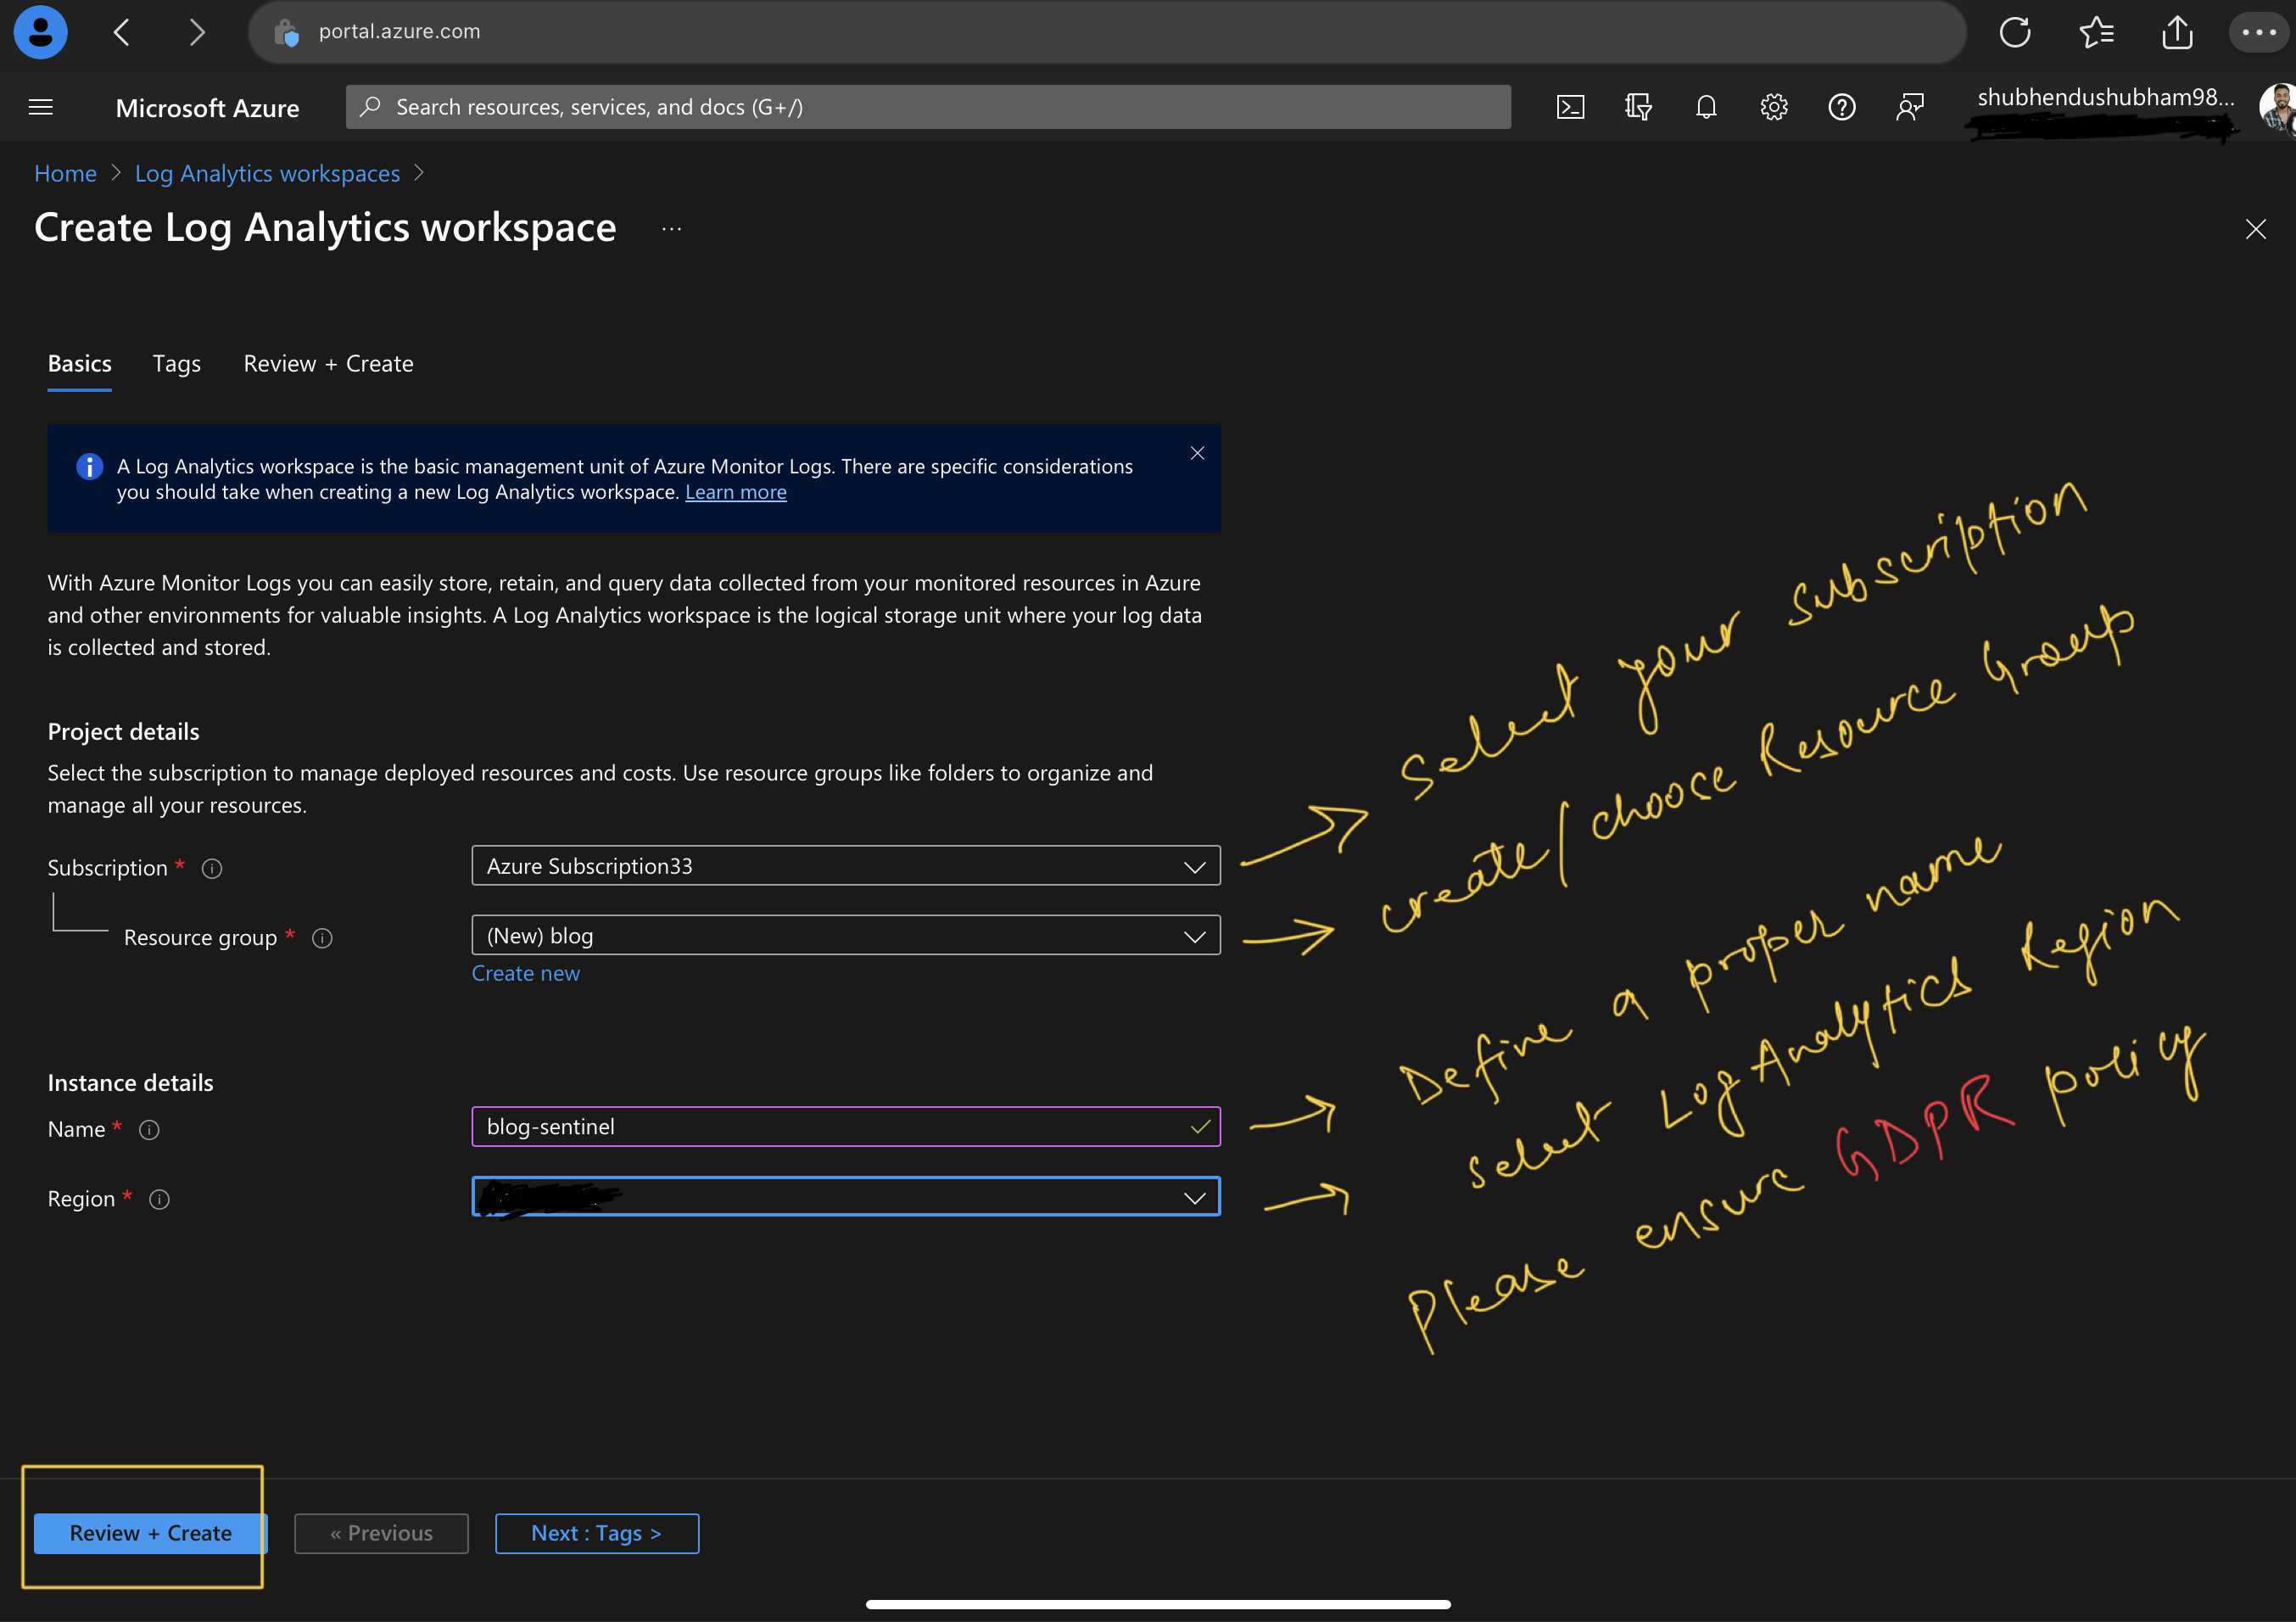
- Select Review + create to validate the new workspace then click on create to deploy the workspace.
- Wait for a few seconds, after deployment is completed, click on go to resources.

Now we have to deploy Microsoft Sentinel to the recently created Log Analytics workspace.
- Search and Select for MS sentinel in Azure portal search box.
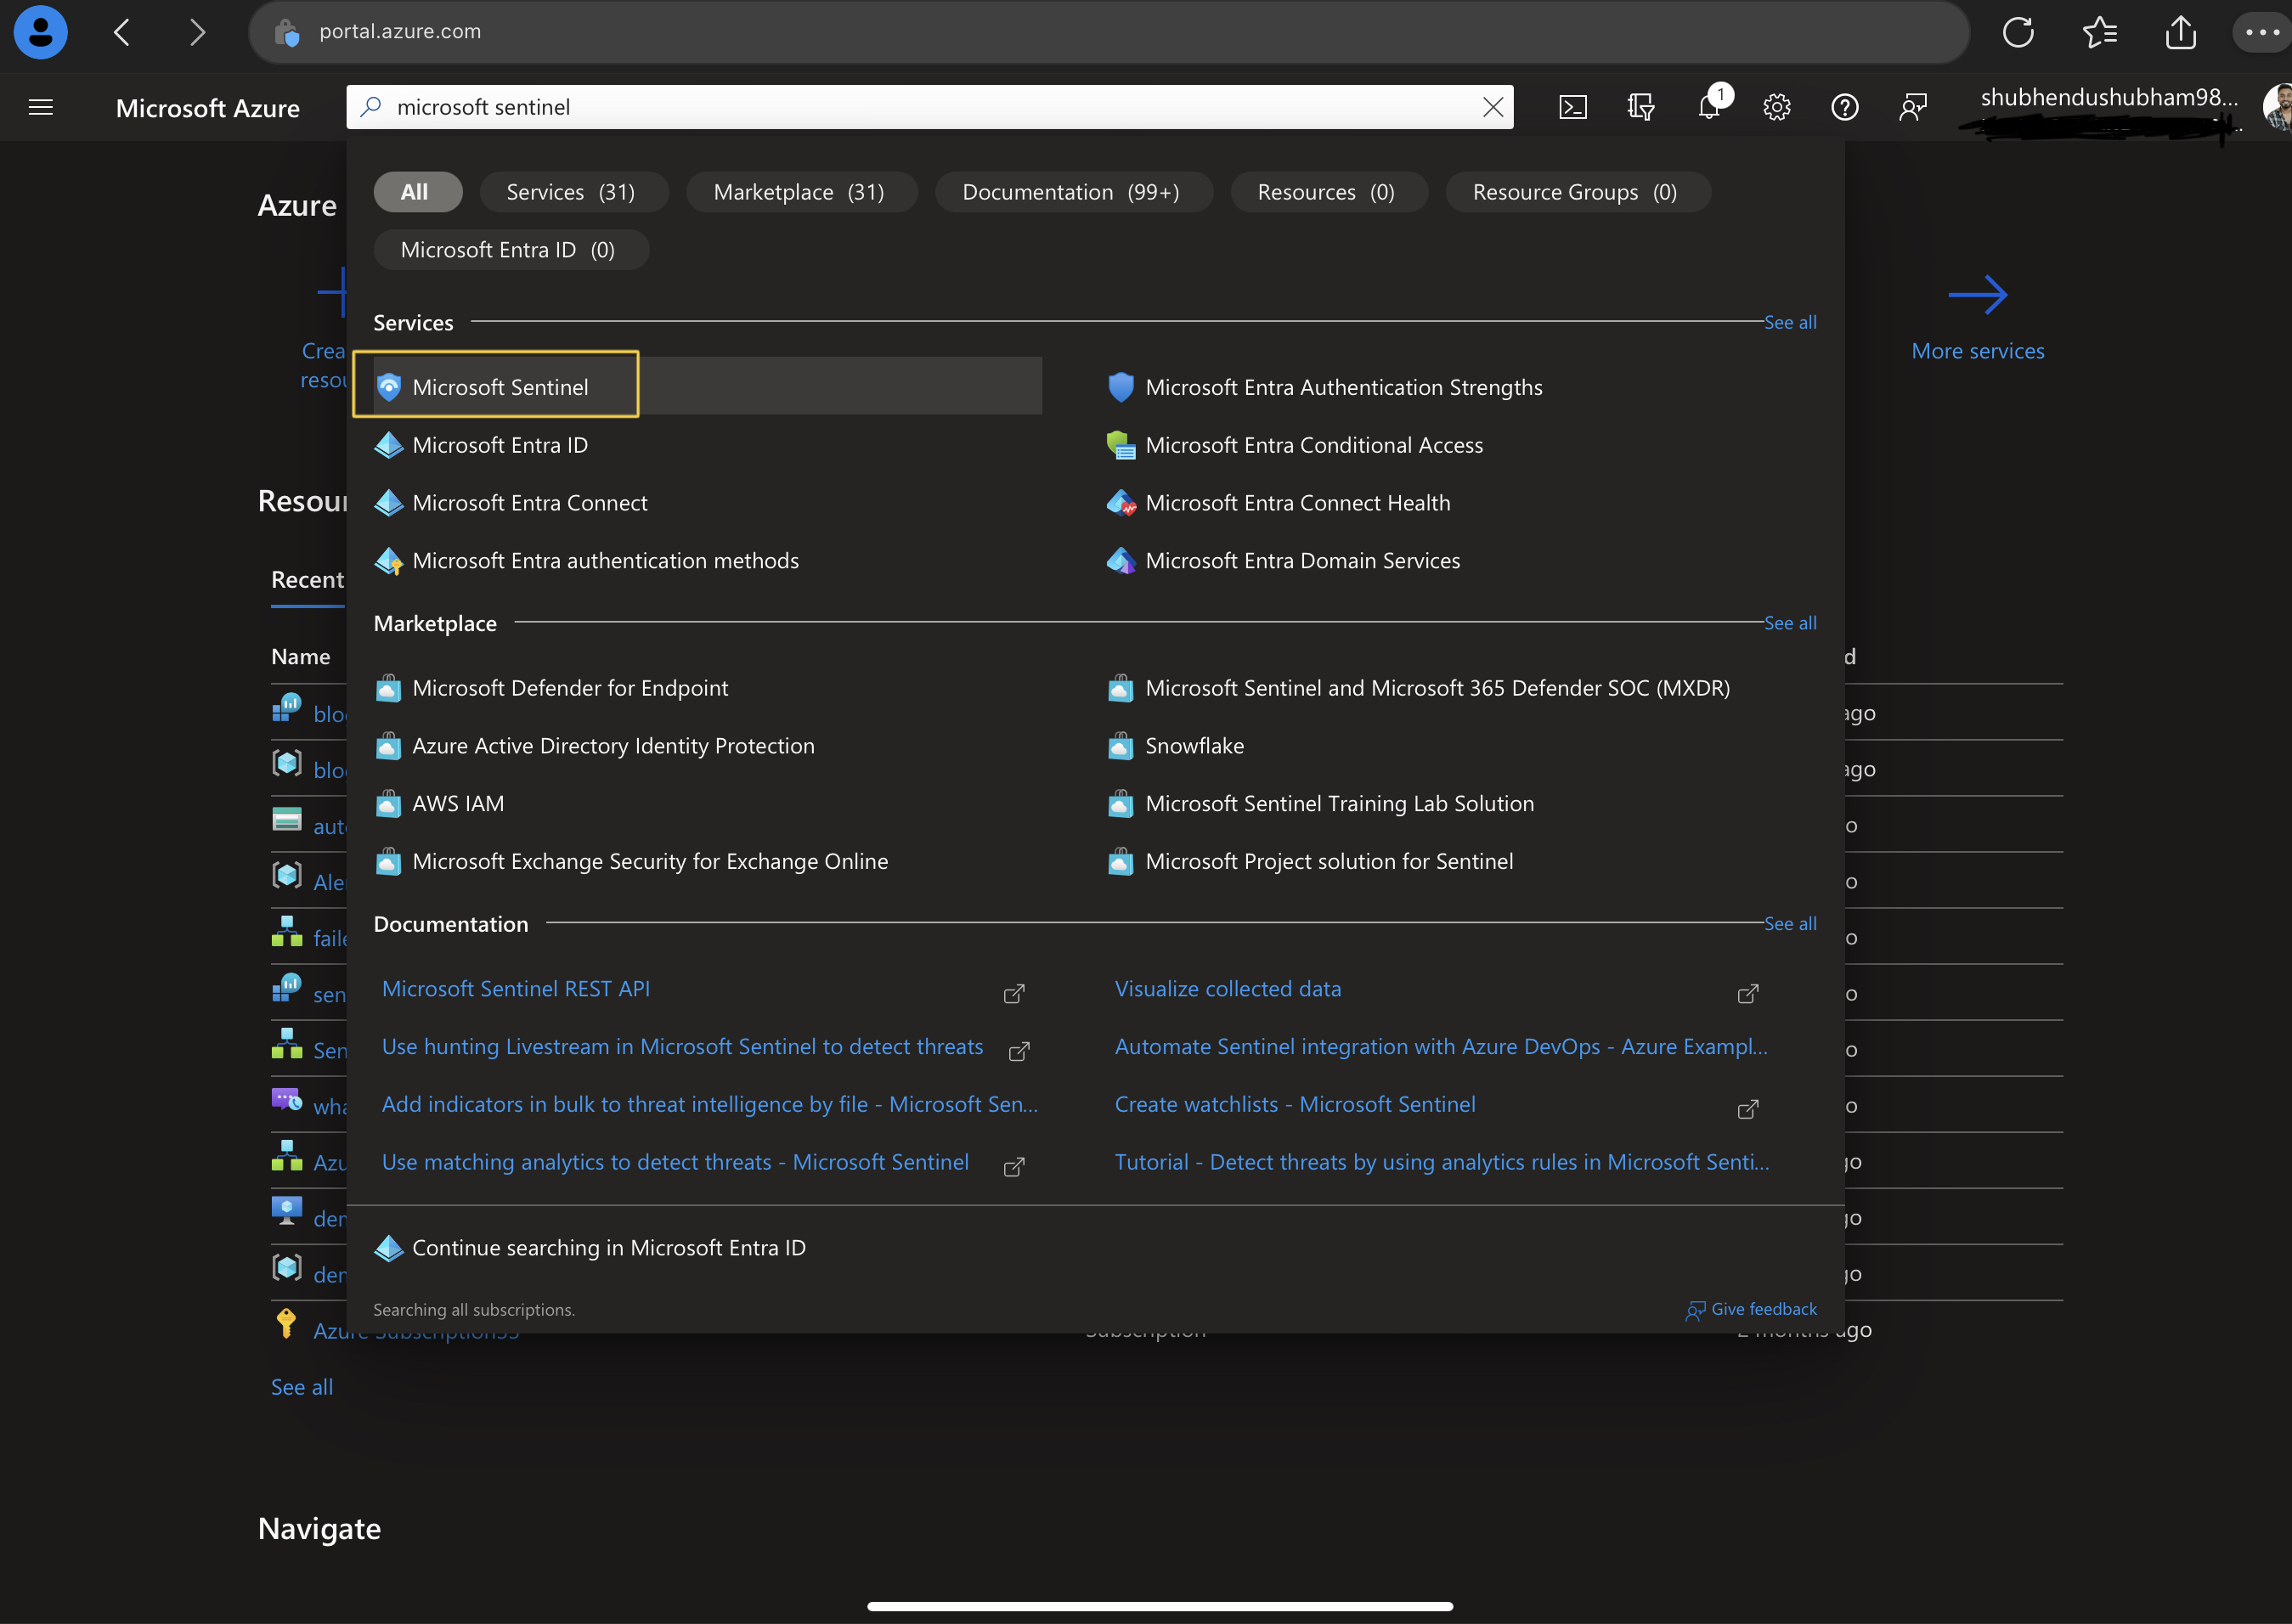
- Click on + Create

- Select recently created workspace and click Add

- Automatically 31-days free MS Sentinel trial will be added.

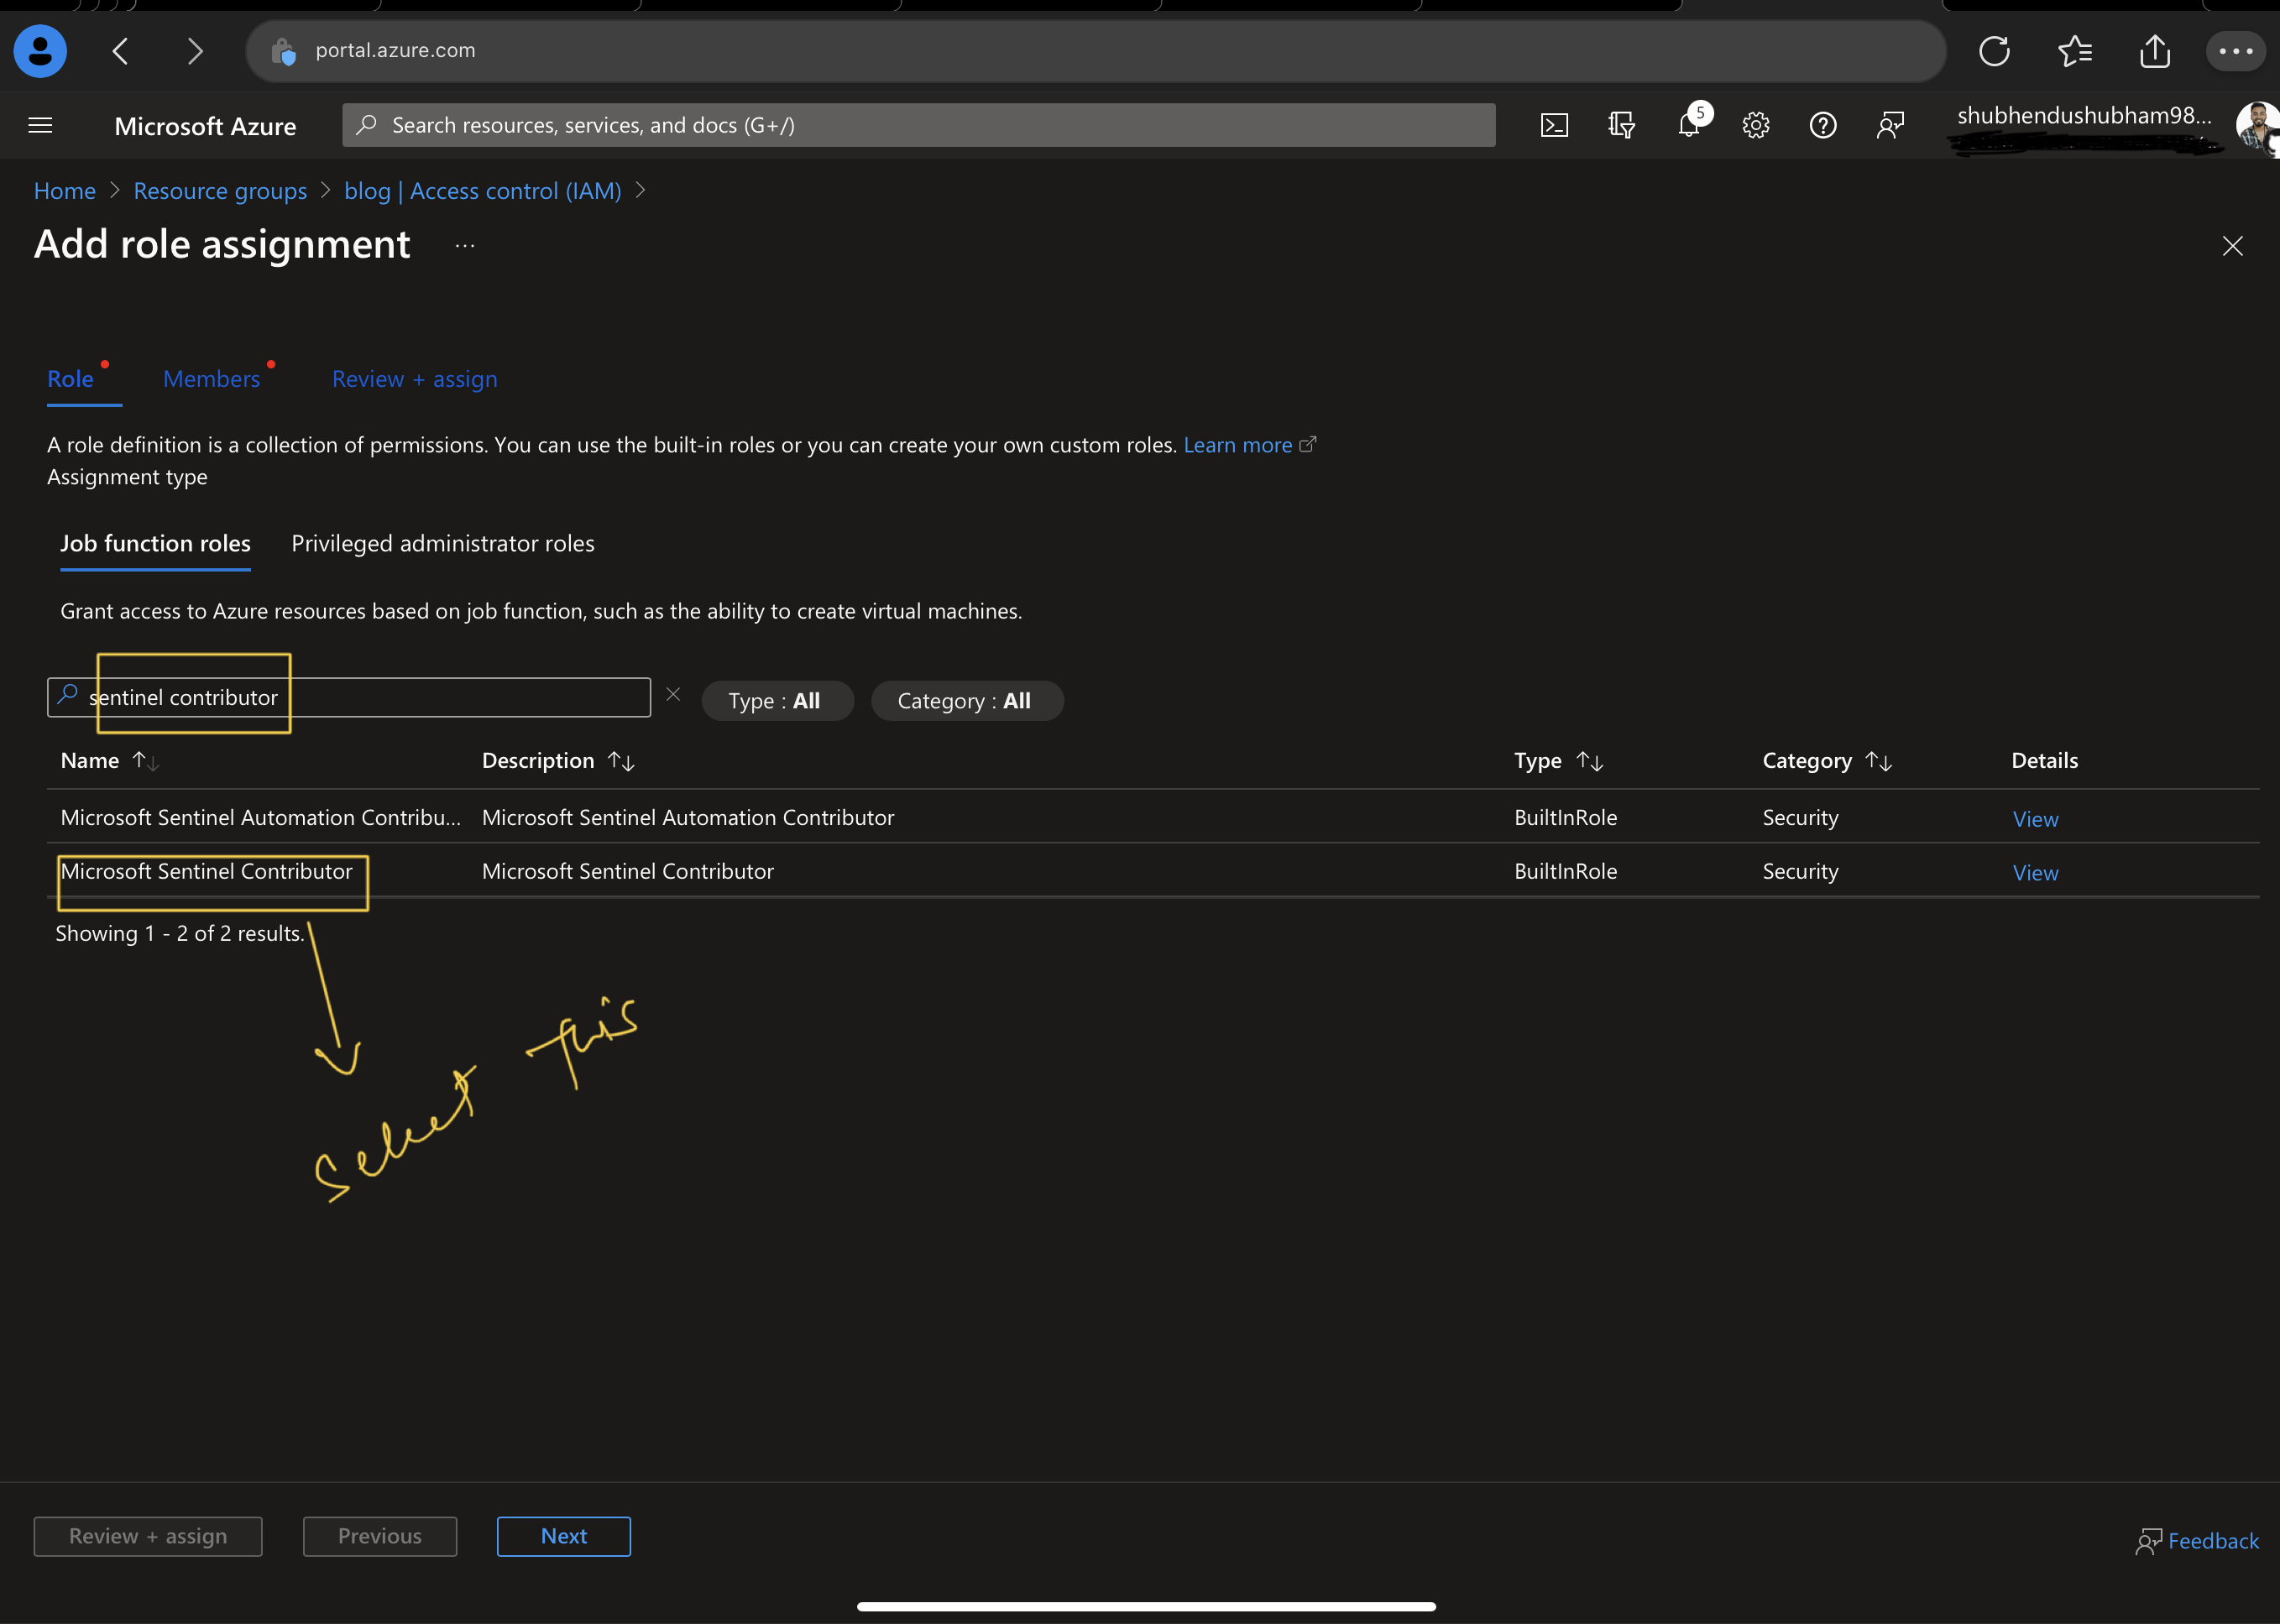
Now Next step will be assiging a Microsoft Sentinel role to a user
- Go to the Resource Group of Log Analytics workspace
- Select Access control(IAM)
- Select Add and Add role assignment

- In the search bar search and select Mirosoft Sentinel Contributor role and click next
- Select the option user,group or service principal

- Select + Select members and assign to role to the proper user
- click review and assign
Now let’s connect the data connector to the Sentinel.
- Jump over MS Sentinel and select content Hub blade from content management

- Select Azure Activity Data connector and click on install
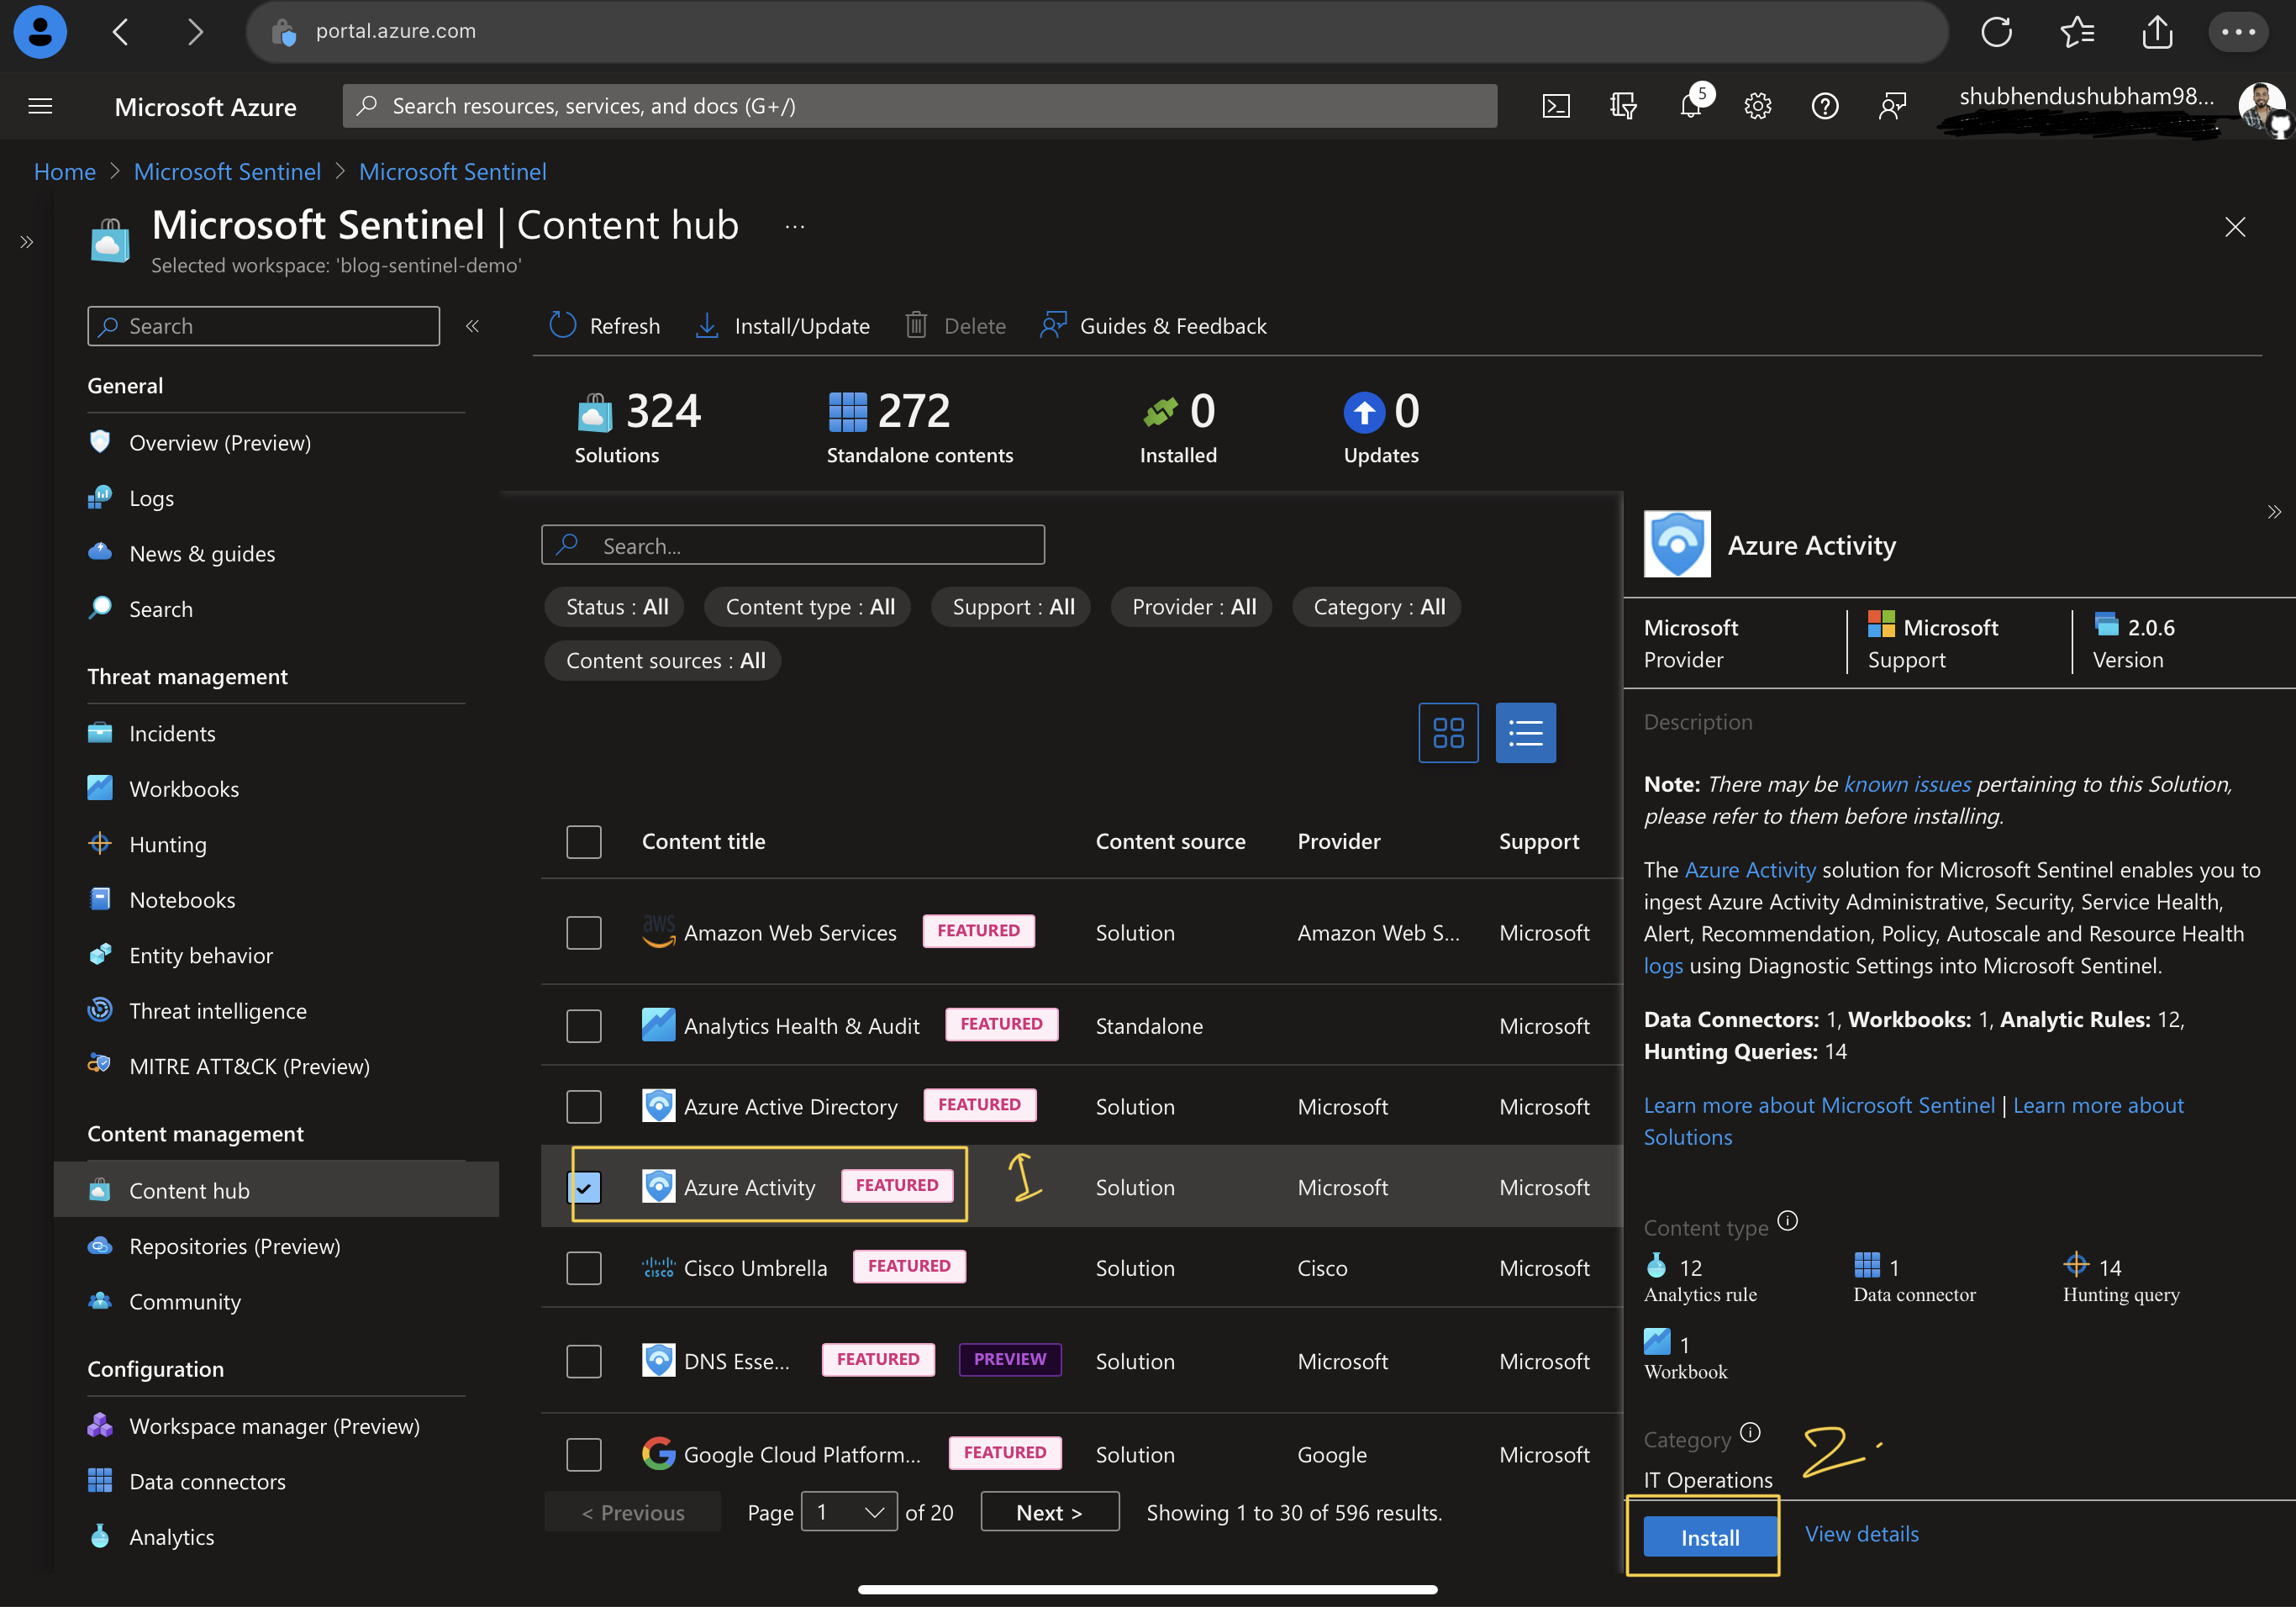
- After successful installation, Installed connector blade will change to 1.

- After sometime we can check Logs using “Hearbeat” KQL command.
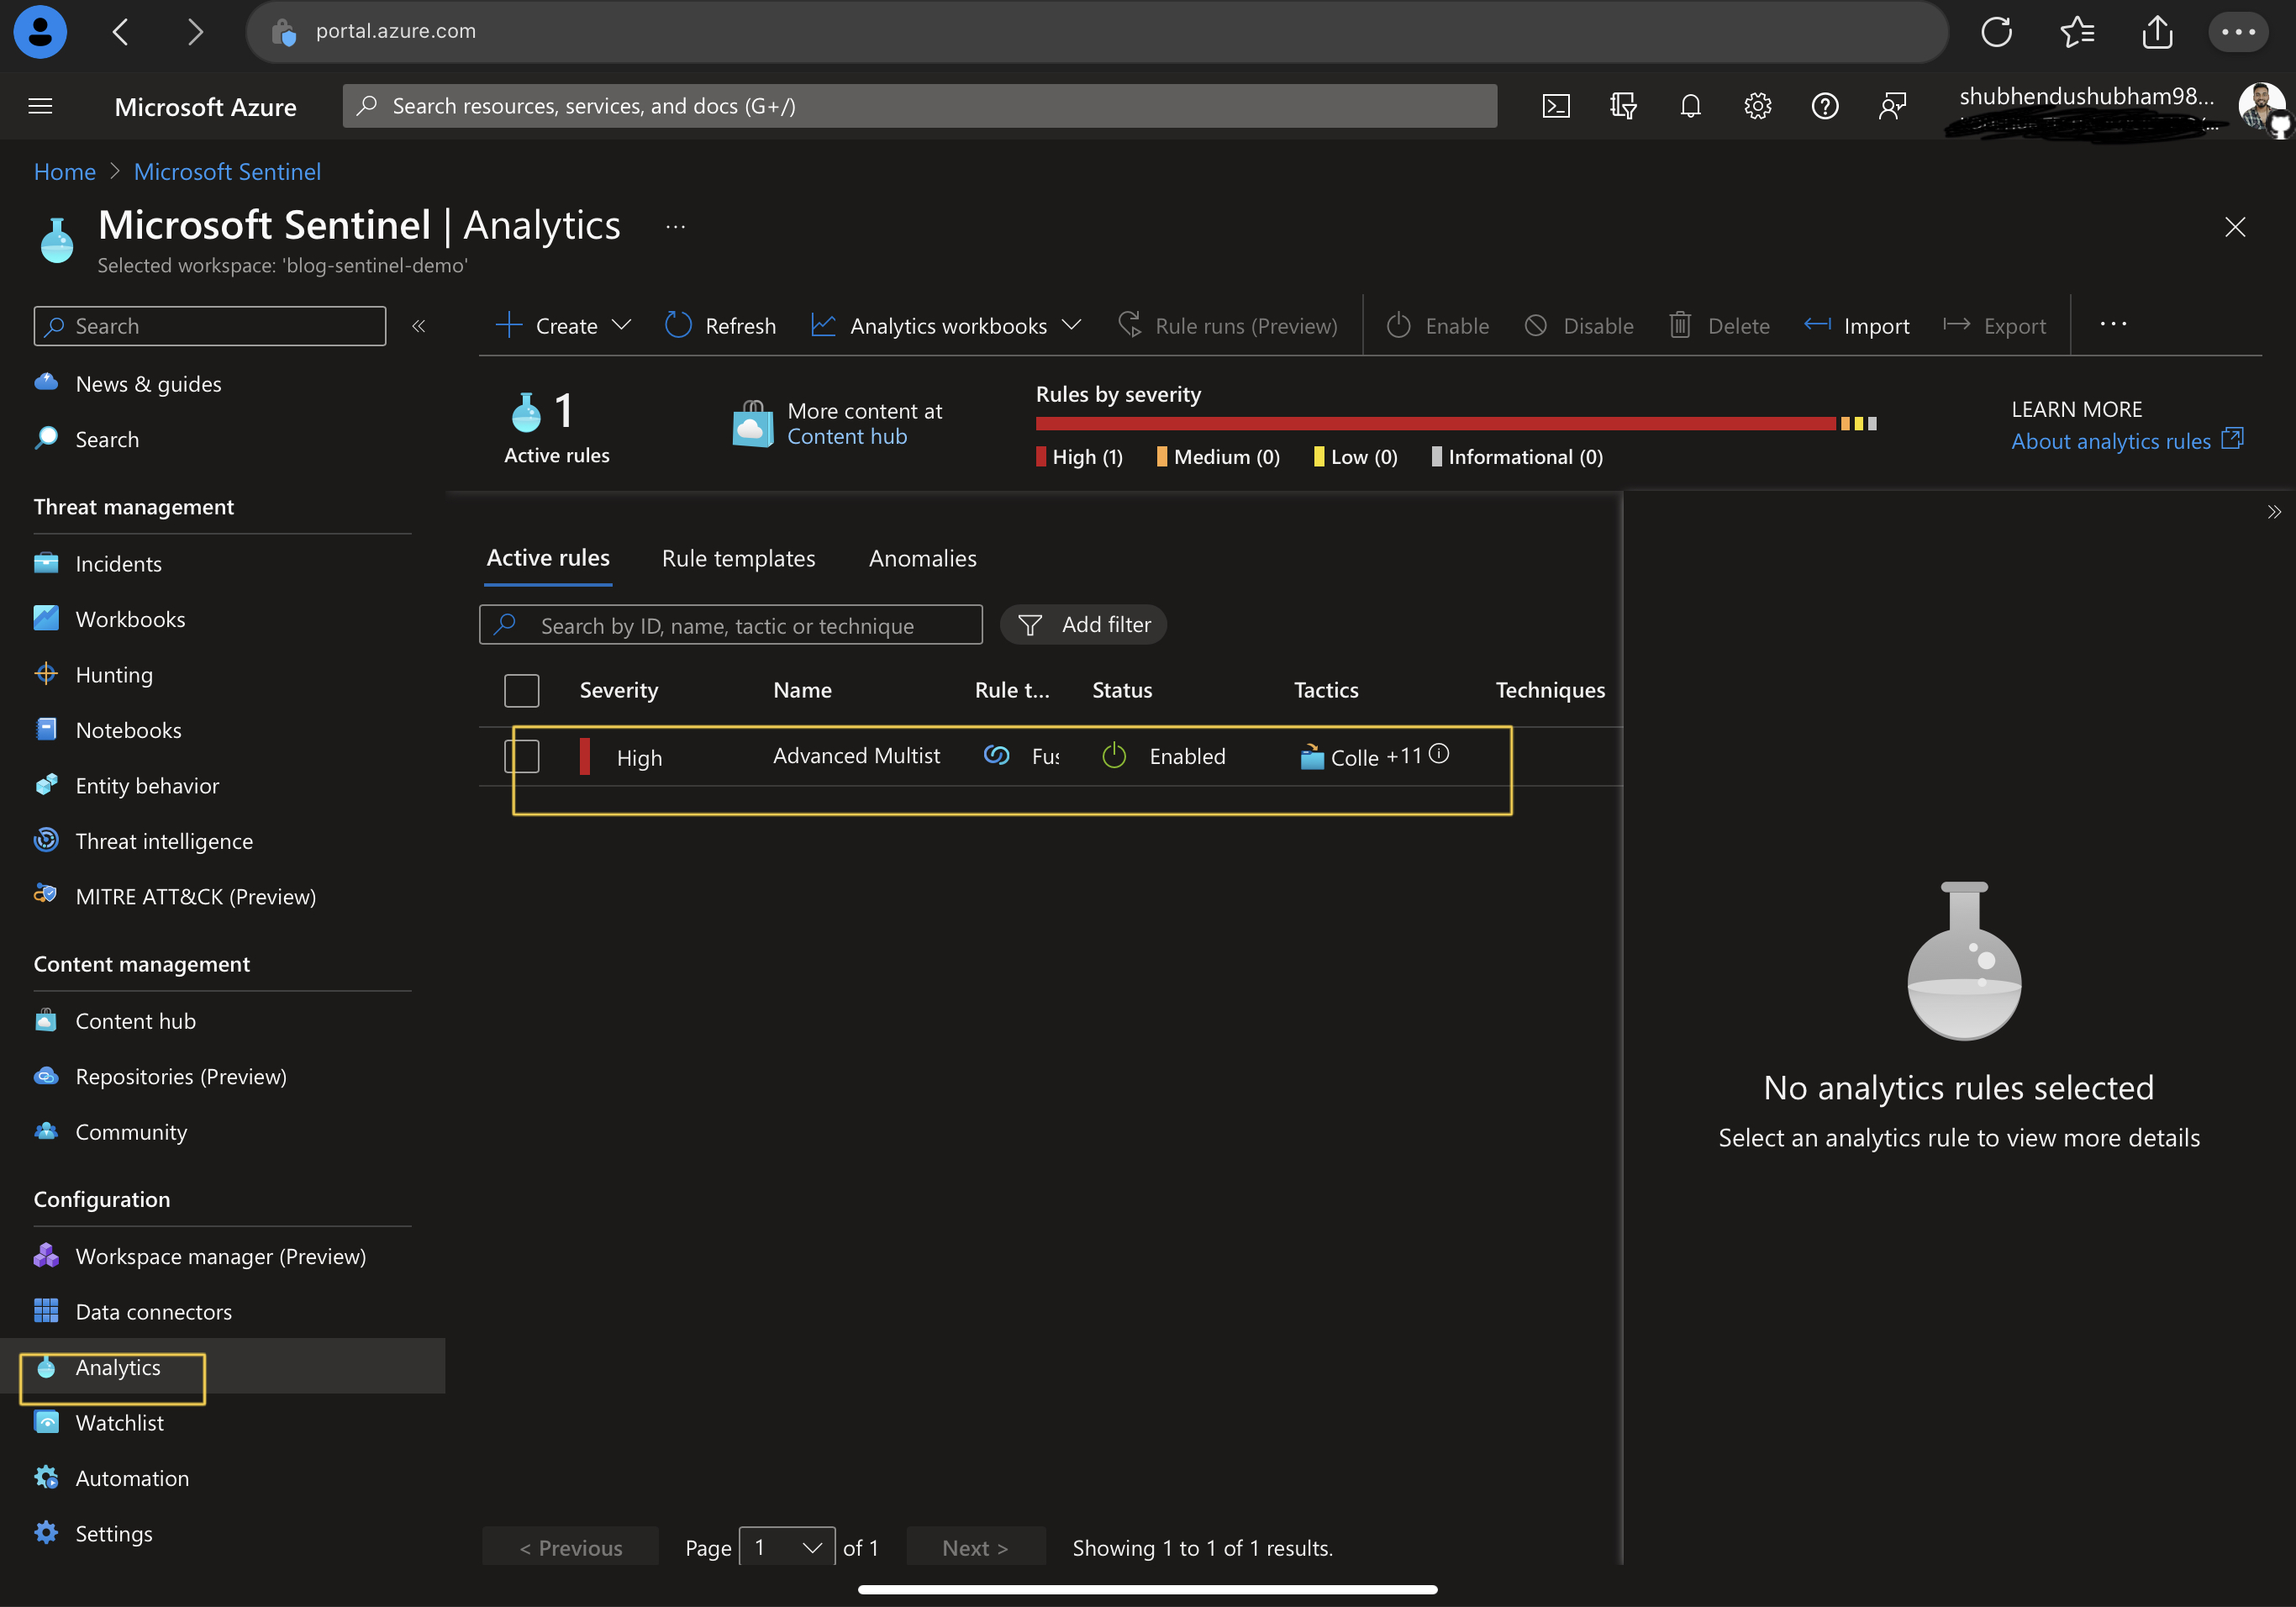
- For Analytics rules creation , visit Analytics rule blade under configuration tab.
Thanks for reading blog, keep learning Keep Troubleshooting.
Work with me
Got a security challenge, architecture review, or just want to talk through something? Book a free 30-min call.

Comments